Monday, 13 December 2010

Bling Wreath Tutorial and giveaway!!

I could have been a magpie in a former life....honest!! Anything shiny and pretty and I have to have it! lol

I couldnt resist making a bling wreath when I saw the masses of pearls on display in Primark - they just screamed 'do something with me' and Im sure the girl thought I was nuts buying 6 strands of 2 pearls and telling her it didnt matter if they were tangled as i wasnt going to wear them anyway! lol

All you need to make your very own bling wreath are...

6 inch polystyrene ring (craft shop)
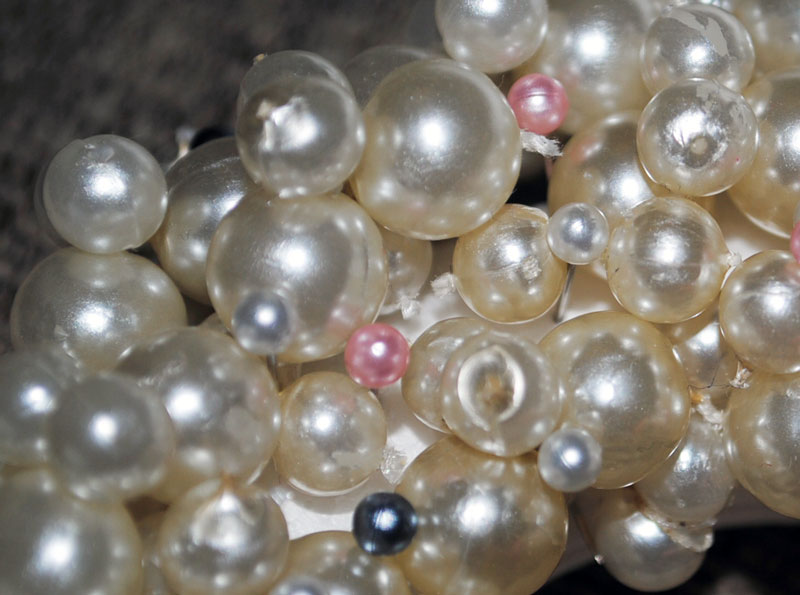
LOTS of cream, metalic and pink pearl ended pins (craft/sewing shops)
3 sets of double layer pearl necklaces (Primark)
Flowers and bling taken from cheap/on sale jewellery (Primark)
Silicone Glue
(I didnt use everything pictured and cant guarantee that I can send exactly the same but you will be happy with the parcel) :)

Take the thick necklace between 2 of the beads so that just have one long thread of pearls. Using the thinner link of pearls, do the same again then place one bead either side of the gap between the bigger beads. Snip and twist these 2 smaller beads to lock in place. Continue doing this until all of the beads are attached to the original long thread.
Carefully pin the pearls to the polystyrene ring by slotting the pin through the gaps between the tied beads. You can also thread it through some of the cotton between the spaces which will hold it in place more securely. Work from the outer edge first, pin it carefully to one side and revolve the ring 360 degrees pinning as you go. Work in circles towards the centre and it should take 3 turns around the ring to cover the whole front. Once you have the whole ring covered with the beads now its time to make it even prettier! Place flowers, glitz, bling, pearls, gems - whatever you fancy, in the bottom right hand corner and adhere with silicone. 
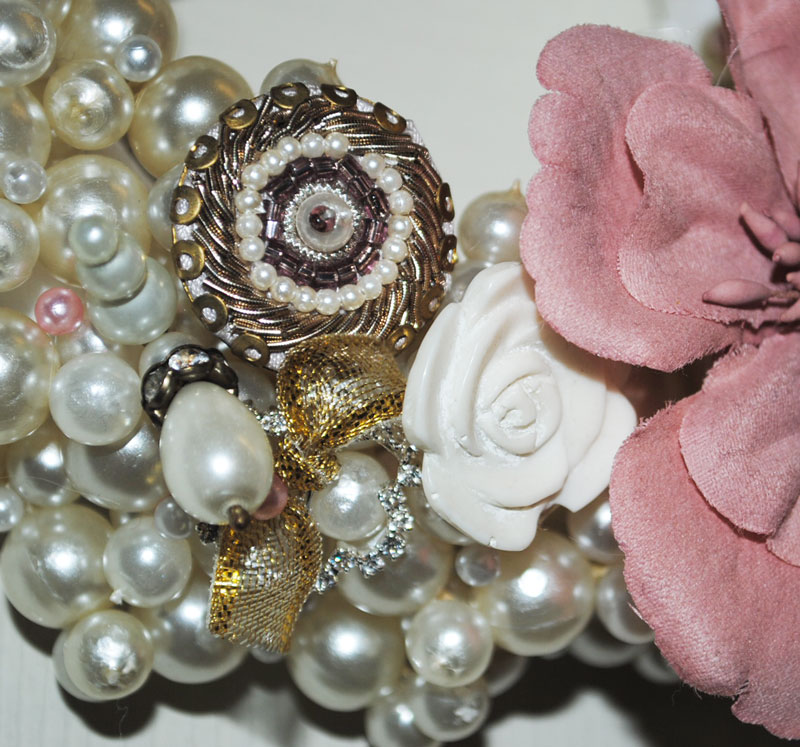
Dry completely flat. This can be used any time of year and would be pretty for a Princess Birthday party or a wedding centrepiece with candle etc :)

For your chance to win all the goodies to make your own bling wreath please pop your name below and I will pick a winner at random on Wednesday :) Good Luck!!

Sunday, 12 December 2010

Rag Wreath Tutorial


Not that these havent been made a thousand times before but I thought step by step photos might encourage those who havent made them before to try! They are so easy and so pretty to make and of course you could use a multitude of colours for ANY occassion - rusts for Autumn, blues or pinks for birthday parties, heck even earthy tones and pop a little Welcome to our Home sign on it - that way you can display them all year! :)

All you will need is a polystyrene wreath and some pretty fabric! Edited to add: I bought half a metre of 4 different fabrics and still have about 1/4 of each left :) Choose your colour palette and cut the fabric into 1 inch thick strips between 8 and 10 inches long. Loop the strips around the wreath and fasten into a knot before trimming the ends to a point. Continue all the way around, butting up each strip so that no polystyrene is showing. Trim if necessary and display! :)Tomorrow I am heading back to the shops to pick up more of these pearls and bling......... fancy making your own bling wreath??

Check in tomorrow for a tutorial and giveaway! :)

Angels & Wreaths!

I can remember being little and wanting to throw myself into the huge piles of snow to make snowangels, it was always icy cold and ended up down the back of my jacket, matted in my now soggy hair and it was a nightmare to get back up without ruining the whole angel! lol
The boys obviously have the same thoughts and threw themselves onto the ground on the way home from the Christmas Carol service, being the good mummy I am I had my camera with me (ok so only just remembered it at the last second!) and snapped some photos! I was torn between 'ack there might be dog muck and I SO want to join them!' LOL

Confession time......I love pompoms! I could sit for hours (and believe me i did!) and make all kinds of sizes and colours! I knew exactly what i wanted to do for one of my Christmas wreaths this year so set to work on making a pompom wreath. The cardboard circles to start with were cut using 2 of the small circle nestabilities (not the very smallest - the next size was used for the hole in the middle and then the next size up was used for the outer circle - does that make sense?) When finished, each pompom is approx 2 to 3 inches in diameter.These are ordinary 99p balls of wool and I have enough left for possibly a wreath with smaller pompoms - it only took me one day and I love the finished look - cosy I think is the word im looking for! :)

Later I will share pics of the rag wreath and bling (be still my heart!!) wreath I have made too... :)

Friday, 10 December 2010

Cookie Baubles!

Just a quickie tonight as I have lots of Christmas projects I want to share over the weekend.

I wanted to make some flooded cookie baubles after seeing what the girls made at The Pioneer Woman ranch this past weekend - far too cute!! I got my trusty cookie recipe and out of the hundreds of cutters, not one looked like a bauble! lol

I improvised by using one of my teeny gingerbread men! After only cutting half of his body out i then used the circle cutter again (the same one I used for the bauble circle so that it would have the same curve) to chop him halfway through his arms. Thus making the little metalic bit at the top of the bauble! A little pressure when adding it to the bauble before cooking and all is well - these cookies are now baked, outlined and ready for flooding tomorrow :)


Wednesday, 8 December 2010

Week 45 - Special Treat Breakfast Rolls!

I made these today after having a craving for something sweet and savoury together! Now, I know technically there is nothing savoury about these rolls but once you get that burst of currant, a little kick of the bitter dark chocolate, all laced together with the lemon ice....well, lets just say there isnt any for breakfast tomorrow and all my cravings have been satisfied! lol

Ingredients

1 pack ready rolled puff pastry
2 cups of sweet mince meat
100g dark chocolate
8tbsp icing sugar
1 lemon

egg wash for shine before baking


Take the ready rolled puff pastry out of the fridge approx 10 minutes before using to give it a chance to warm a little. Lie it flat and prepare the filling.Microwave the chocolate until just melted and using either a spatula or a brush apply a thin coat to the pastry.Next apply a layer of the sweet mincemeat.Starting from one of the longer sides, carefully roll the pastry until it resembles a swiss roll.Cut 1 inch slices and lie them so that they are against each other on a greased baking tray. They will swell to fill the spaces. Brush with egg wash.
Bake for 20-25 minutes or until golden brown and bubbling.To make the icing, sieve 8tbsp of icing sugar into a small bowl (i use a tea strainer for small amounts of icing - this is ideal for coating workbenches before rolling out dough etc too) Add the juice of 1 lemon and mix until a runny consistency, pour over the cooling pastry and allow to set slightly. Eat warm :)

Enjoy xx

Tuesday, 7 December 2010

Personalised Affirmation Wheel :)

I came up with this idea whilst making some Christmas decorations (remember the grown up advent calender from last year? ) While I was making the little pouches for this years advent I had an idea to put them all together in the form of a wreath....well one thing moved to another and I ended up with a little affirmation wheel!Whats an affirmation wheel you may ask??

Well, I have decided to make one of these for each of my sisters. There are personalised notes inside each of the pouches that explains how strong we are, how loved we are and little snippits of quotes etc to pick us up when we are down. I have fastened little charms to certain pouches which are released (or asked to be removed and stored somewhere to hold the memory) when that pouch is opened, they can't tell which ones the charms are attached to as its woven into the flower etc but each one has a special meaning.

This could be made in Christmas colours and done as an advent but I thought these pretty colours lend themselves to all year round and would make a fab little boost to self esteem when we need it -
hope you like it and let me know if you make one, they are such fun and so personal I just know they will be loved :)

Monday, 6 December 2010

Week 44 - Sweet pepper & Garlic stuffed Chicken wrapped in bacon

This one is so simple yet tastes absolutely delicious! Can be rustled up in less than 5 minutes and looks impressive as a main meal - or make smaller bite size ones as part of a party platter!

Ingredients

1 tub cream cheese
3 cloves of garlic
2 large red sweet pointed peppers
6 chicken breasts
12 rashers of unsmoked bacon

Dice up the peppers and crush the garlic cloves.
Add the pepper, garlic, salt, pepper and cream cheese to a mixer and blitz on high for 1 minute.
Using a meat tenderizer, hit the chicken breast until it is softened and twice the size. Pop a spoonful of the pepper mix into the middle and bring up the sides to close.
Wrap in bacon and cover with foil. Bake in a preheated oven at 180* c for 20 minutes - remove foil and cook for a further 5 minutes until the bacon is crispy. Serve with salad or rice :)
Enjoy xxx